本节用Yeoman和AngularJS搭建一个功能完整的应用CustomerUI,向后端CustomerApi发送跨域请求。
跨域资源共享(Cross-Origin Resource Sharing)是一种允许当前域(domain)的资源(比如html/js/web service)被其他域的脚本请求访问的机制,通常由于同域安全策略(the same-origin security policy)浏览器会禁止这种跨域请求。
一、视图
1.在main.html中
<div class="jumbotron">
  <h1>Hello!</h1>
</div>

<div class="row marketing">
  <a class="btn btn-lg btn-success" ng-href="#/createCustomer">Create</a>
  <a class="btn btn-lg btn-success" ng-href="#/getCustomer">GetByName</a>
</div>
2.在getView.html中
<p>This is the get customer by name view.</p>
<h4>Name</h4>
<input type="text" ng-model="name"/>
<button class="btn btn-lg btn-success" ng-click="getCustomer()" >Get</button><br><br>
3.在createView.html中
<p>This is the create customer view.</p>
<h4>Name</h4>
<input type="text" ng-model="name"/>
<h4>Age</h4>
<input type="text" ng-model="age"/><br><br>
<button class="btn btn-lg btn-success" ng-click="createCustomer()" >Create</button><br><br>
二、controller
1.在getCustomer.js中
'use strict';

angular.module('customerUiApp')
  .controller('GetCtrl', ['$scope', '$http', function ($scope, $http) {

     $scope.getCustomer = function(){
       var url = 'http://localhost:8080/customers?name=' + $scope.name;
       $http({
          url : url,
          method : 'GET'
       }).then(function(response) {
          $scope.info = response.data;
          alert('Get '+$scope.name+' successfully!');
        },function(response) {
          $scope.info = response.data || "Request failed";
          alert($scope.info);
       });
     };
  }]);
2.在createCustomer.js中
'use strict';

angular.module('customerUiApp')
  .controller('CreateCtrl', ['$scope', '$http', function ($scope, $http) {
    $scope.createCustomer = function(){
       $http({
          url : 'http://localhost:8080/customers',
          method : 'POST',
          data: {
              name : $scope.name,
              age : $scope.age
          }
       }).then(function(response) {
          $scope.info = response.data;
          alert('Create '+$scope.name+' successfully!');
        },function(response) {
          $scope.info = response.data || "Request failed";
          alert($scope.info);
       });
    };

  }]);
三、配置路由
在app.js中
'use strict';

angular.module('customerUiApp', ['ngRoute'])
  .config(function ($routeProvider) {
    $routeProvider
      .when('/', {
        templateUrl: 'views/main.html'
      })
      .when('/createCustomer', {
        templateUrl: 'views/createView.html',
        controller: 'CreateCtrl'
      })
      .when('/getCustomer', {
        templateUrl: 'views/getView.html',
        controller: 'GetCtrl'
      })
      .otherwise({
        redirectTo: '/'
      });
  });
四、基准HTML文件
在index.html中
<!doctype html>
<html>
    <head>
        <meta charset="utf-8">
        <title>AngularTest</title>
        <link rel="stylesheet" href="bower_components/bootstrap/dist/css/bootstrap.css" />
        <link rel="stylesheet" href="styles/main.css">
    </head>

    <body ng-app="customerUiApp">
        <div class="container">
        <div ng-view=""></div>
        </div>

        <script src="bower_components/jquery/dist/jquery.js"></script>
        <script src="bower_components/angular/angular.js"></script>
        <script src="bower_components/bootstrap/dist/js/bootstrap.js"></script>
        <script src="bower_components/angular-route/angular-route.js"></script>
        <script src="scripts/app.js"></script>
        <script src="scripts/controllers/createCustomer.js"></script>
        <script src="scripts/controllers/getCustomer.js"></script>
    </body>
</html>
导入主程序app.js以及createCustomer.js、getCustomer.jscontroller。
五、测试
1、在test/spec/controllers/getCustomer.js中
'use strict';

describe('Controller: GetCtrl', function () {
  beforeEach(module('customerUiApp'));

  var GetCtrl,scope,$httpBackend;

  beforeEach(inject(function ($controller, $rootScope, _$httpBackend_) {
    scope = $rootScope.$new();
    $httpBackend = _$httpBackend_;
    GetCtrl = $controller('GetCtrl', {
      $scope: scope
    });
  }));

  it('should send get request', function () {
    $httpBackend
      .expect('GET', 'http://localhost:8080/customers?name=Alex')
      .respond( {name :'Alex', age:'20'});
    scope.name = 'Alex';

    scope.getCustomer();
    $httpBackend.flush();

    expect(scope.info.name).toBe('Alex');
    expect(scope.info.age).toBe('20');
  });
});
2、在test/spec/controllers/createCustomer.js中
'use strict';

describe('Controller: CreateCtrl', function () {
  beforeEach(module('customerUiApp'));

  var CreateCtrl,scope,$httpBackend;

  beforeEach(inject(function ($controller, $rootScope, _$httpBackend_) {
    scope = $rootScope.$new();
    $httpBackend = _$httpBackend_;
    CreateCtrl = $controller('CreateCtrl', {
      $scope: scope
    });
  }));

  it('should send post request', function () {
    $httpBackend
      .expect('POST', 'http://localhost:8080/customers')
      .respond( {name :'Alex', age:'20'});
    scope.name = 'Alex';

    scope.createCustomer();
    $httpBackend.flush();

    expect(scope.info.name).toBe('Alex');
    expect(scope.info.age).toBe('20');
  });
});
六、运行及结果
1、本地启动CustomerApi运行在8080端口
2、grunt serve启动CustomerUI
3、在terminal中输入下述命令,使其允许跨域请求
open /Applications/Google\ Chrome.app --args --allow-file-access-from-files --disable-web-security
4、输入url
在弹出的浏览器输入http://localhost:9000/ 
5、点击GetByName
进入get customer by name界面如下: 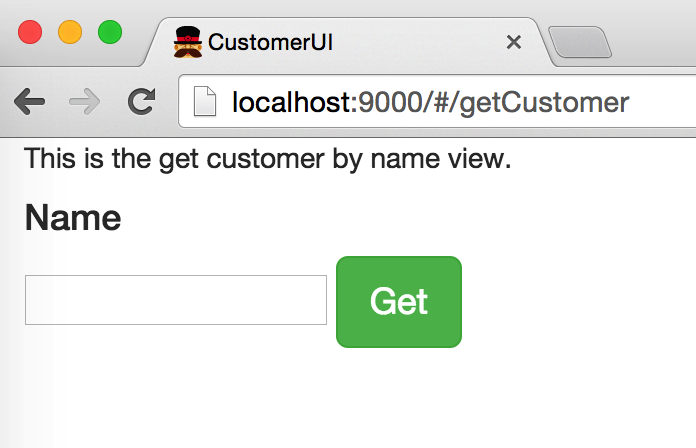
输入name,出现CustomerApi的认证如下: 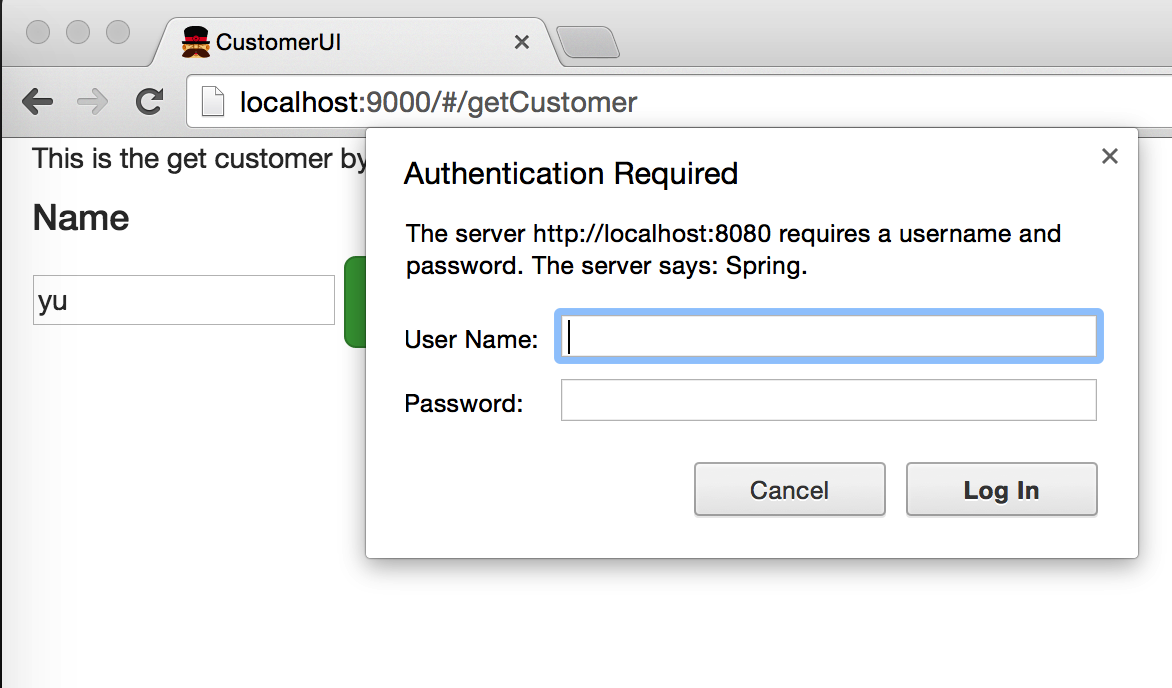
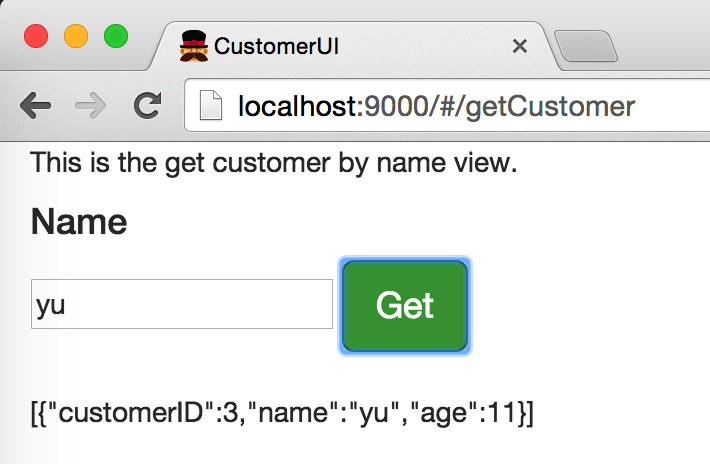
输入用户名user和密码password,得到: 
显示通过CustomerApi获取到的Customer信息如下: